The OEM Appliance Manufacturing Process: From Mold Design to Container Loading
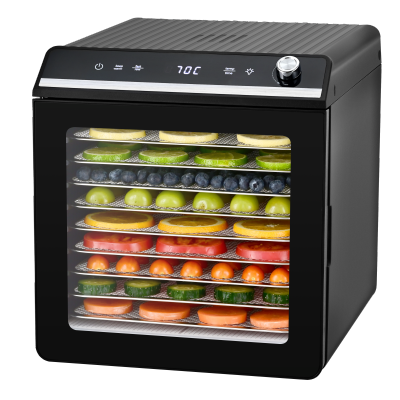
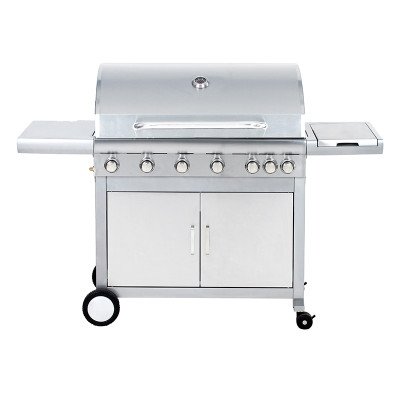
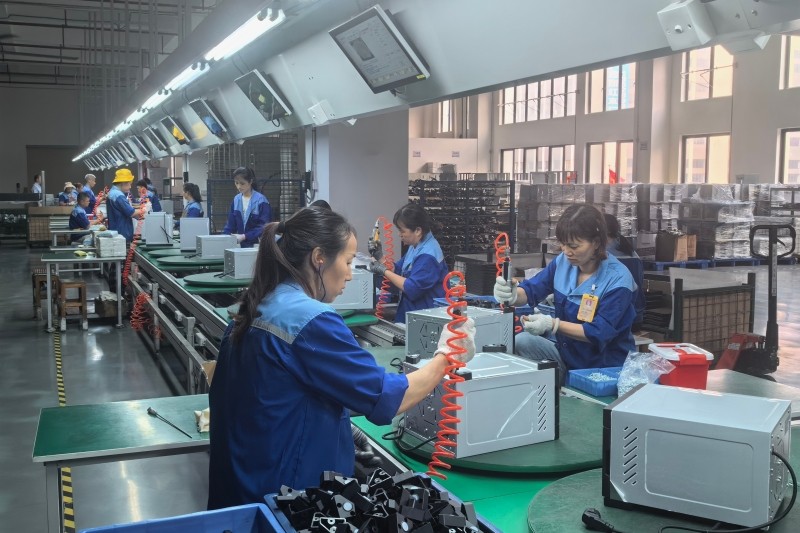
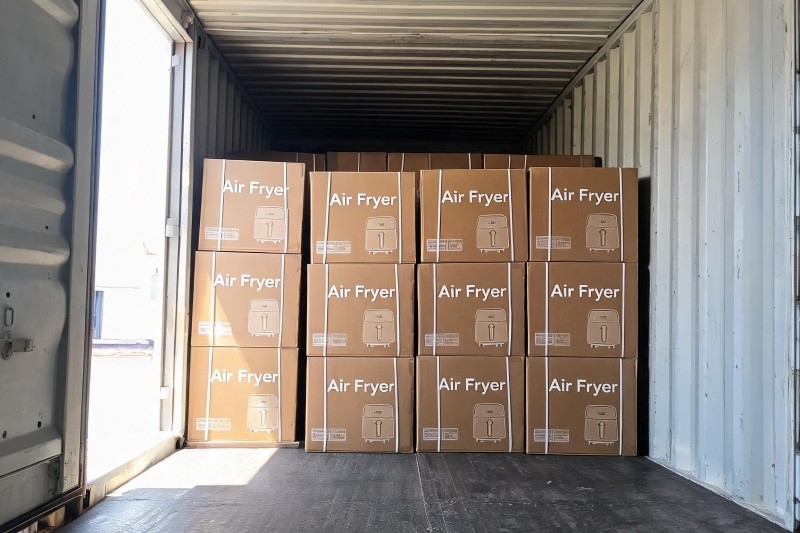
For most importers and private-label brands, the OEM appliance manufacturing process is a black box: they know the quote, the sample, and the delivery date — but the weeks in between can decide whether a program succeeds or fails. Understanding exactly how a kitchen appliance moves from engineering brief to packed container is not optional homework; it is the difference between negotiating from strength and being surprised by late tooling, inconsistent quality, or failed certification. This technical guide walks through the complete OEM manufacturing process for small kitchen appliances — the six stages, the equipment involved, the quality-control gates, the certification requirements, and the realistic timelines — so that buyers can audit a factory's capability before committing and manage every milestone once production begins. Every small appliance OEM program follows the same skeleton, whether the product is a food dehydrator, an air fryer, or an electric grill. The stages differ in duration and cost share, but the sequence is fixed: engineering feasibility comes before tooling, tooling comes before component production, and component production comes before assembly and testing. The six stages of an OEM appliance program: Most OEM failures trace back to Stage 1 or Stage 2 — decisions made before the first mold is cut. The single most common mistake is treating the approved sample as the spec: the sample proves the design works, but only process control proves the factory can repeat it at volume. An OEM program starts with a written product brief, not a vague idea. The brief must specify category, capacity, wattage, voltage and frequency, plug type, housing material, food-contact parts, packaging language, and target certifications. Factories that do serious OEM work run every brief through a DFM (design for manufacturability) review before any steel is cut — typically within 1–3 days of receiving the CAD files. DFM engineers check wall-thickness uniformity, draft angles, gate location, ejector-pin placement, and material selection. The goal is to catch problems that would cause sink marks, warping, weld lines, or ejection damage in the mold. In a well-run factory, most DFM corrections are minor — adjusting a radius or adding a degree of draft — and are resolved in a single email exchange. Skipping this step is the most common cause of expensive delays later in the program. Why the brief matters more than the sample: the brief is the contract for the factory's engineering, tooling, and QC teams. If voltage or plug type is changed after tooling starts, every downstream decision — mold inserts, power cords, labels, certification files — has to be reworked. Lock the brief before you order the mold. Injection molding is the backbone of small appliance manufacturing: the housings, trays, fans, and internal frames of most kitchen appliances are molded plastic. The mold — not the assembly line — is the single biggest capital item and the biggest source of lead-time risk in the entire process. Steel grade determines mold life: P20 pre-hardened steel handles roughly 500,000+ shots with unfilled materials, while H13 heat-treated to 48–52 HRC extends beyond 1,000,000 cycles and is the correct choice for high-volume programs. Glass-filled or flame-retardant resins wear cavities faster and push molders toward hardened or plated cavities. The economics explain why so much appliance tooling is built in China: independent RFQ data from 2023–2024 shows Chinese tooling at roughly US$8,000–20,000 for a medium-complexity single-cavity home appliance mold, against US$20,000–50,000 for equivalent US-built tooling — a 2–2.8x gap that persists after logistics and import duties. American Mold Builders Association survey data indicates around 70% of appliance tooling for US OEMs originates in China, driven by this combined cost and lead-time advantage. Once molds are approved, component production begins. A typical small appliance line involves four parallel component streams that converge at final assembly: Integrated factories bring molding, hardware, motors, and electronics under one roof. That matters for buyers because quality responsibility stays with a single quality system — incoming inspection (IQC) verifies raw materials, and in-process inspection (IPQC) checks each stage before the next one starts. A factory that outsources its molding or motors cannot offer the same traceability. Kitchen appliances are defined by heat, so the heating chain deserves its own stage. Heating elements, thermostats, and temperature sensors are pre-assembled and tested before they reach the main line. For temperature-controlled products — dehydrators with 35–75°C ranges, grills with adjustable thermostats, air fryers with digital PID controllers — the sensor-to-controller calibration is verified at this stage, because it is far cheaper to catch a 5°C offset on a bench than after 10,000 units are built. Wiring harnesses are cut, crimped, and continuity-tested. Food-contact sub-assemblies — trays, reservoirs, chutes, and seals — are cleaned and inspected before integration. This is also where the factory builds the compliance traceability trail: batch numbers for materials, components, and sub-assemblies are logged so that any quality issue in the field can be traced back to a specific production lot. The practical lesson for buyers: ask for a process flow chart during the factory audit. A credible factory can show you where each inspection gate sits in the flow. If the answer is "final inspection at the end," quality is a checkpoint, not a system — and that is a red flag for volume production. On the assembly line, components converge: the motor and fan are mounted, heating elements and thermostats installed, control panels wired, housings snapped together, and accessories staged for packing. Automated screwdrivers and fixtures keep assembly consistent, but the real story of this stage is the testing that happens on the line. Standard in-line test sequence for a kitchen appliance: 100% testing on these electrical safety checks is standard practice in credible factories — every unit, not a sample. This is a key audit question: "What percentage of units get a hi-pot test?" If the answer is anything less than 100%, the factory is relying on statistics where you should be relying on guarantees. After passing functional tests, products move to packaging: manuals and accessories are placed, gift boxes assembled, master cartons sealed, and export pallets strapped. But packaging is not the end of quality control — it is the beginning of a second testing round focused on the shipping environment. Buyers should always reserve the right to a third-party pre-shipment inspection on the first production run — and ideally on every run until the factory's consistency is proven. PSI costs a fraction of a container of non-conforming goods. Certification is the layer that ties the whole process together, and it must be decided in Stage 1, not discovered at Stage 6. For a small kitchen appliance, the compliance stack typically includes: The regulatory requirement is simple: production units must remain identical to the certified sample. Any change to materials, components, or construction after certification can invalidate the test report — which is why configuration management is a genuine compliance activity, not paperwork. A factory that documents changes and re-verifies them is protecting the buyer's market access, not just its own liability. Lead times vary with product complexity, but a representative timeline for a new molded kitchen appliance program looks like this: MOQs for OEM orders typically start around 500–1,000 pieces per model, with custom-molded ODM programs requiring more because the mold investment is amortized across the order volume. Buyers should budget roughly 3–5 months from brief to first container for a brand-new molded product, and significantly less for existing-catalog OEM programs where tooling already exists. Manufacturing capability is easier to verify than to trust. These are the audit questions that separate real OEM factories from trading companies with factory photography: None of this requires a buyer to be a manufacturing engineer. It requires asking the right questions and listening for specifics — "our line does a 1,800 V hi-pot test on every unit, records are kept for 3 years" is a completely different answer from "we have QC." Kangye has built its OEM/ODM program on the principle that manufacturing transparency is a product feature. Our facility combines in-house injection molding capability, metal component processing, assembly lines, and a testing station — so buyers get the four-stage quality system (IQC, IPQC, FQC, and OQC) with a single point of responsibility. Every product in our lineup, from the KYS-315 food dehydrator series to the electric grill and air fryer lines, follows the same development path: brief lock, tooling, pilot run, mass production, and pre-shipment inspection, with IEC 60335, CE, UL, CCC, RoHS, and food-contact compliance files managed per program. For buyers, the practical benefit is that our catalog products — already tooled, certified, and in production — can be customized (branding, packaging, voltage, plug, and feature tweaks) without paying for a new mold. That is the difference between a six-week OEM program on an existing model and a five-month program on a brand-new one. The KYS-224 is a compact digital food dehydrator that demonstrates the manufacturing discipline behind Kangye's OEM program: precision-molded BPA-free trays, a rear-mounted horizontal airflow system, and factory-calibrated temperature control — the kind of engineering that only works when every unit passes the same in-line tests. Kangye's catalog spans food dehydrators (5 to 22 trays), electric grills, air fryer ovens, steamers, vacuum sealers, and pet care appliances — all available with the same OEM/ODM flexibility. One factory, one quality system, and one compliance framework cover the whole assortment. For a brand-new molded product, budget roughly 3–5 months from design brief to first container: 2–4 weeks for prototypes, 4–8 weeks for production tooling, 2–4 weeks for certification testing, 1–2 weeks for pilot production, and 4–8 weeks for mass production. Existing catalog products with tooling already in place can ship in 4–6 weeks after customization is confirmed. OEM orders on existing models typically start around 500–1,000 pieces per model. Custom-molded ODM programs usually require larger initial volumes because the mold investment must be amortized across the order quantity. MOQ also varies by product size and packaging — a compact 5-tray dehydrator fits over 2,000 units in a 40HQ container, while larger commercial units carry lower MOQs by count. An injection mold is precision-machined hardened steel engineered for hundreds of thousands of shots. Costs reflect machining hours, steel grade, cavity count, and complexity. Mold ownership is a contract point: buyers often pay for the mold and own it, while the factory may hold a copy for service. Agree on ownership, storage, and mold maintenance responsibility in writing before tooling begins. A prototype sample proves the design works — form, fit, and function from soft or aluminum tooling. A pilot run (trial production) uses the production molds and the production line to prove the process works at scale, producing a small batch of pre-production units for certification testing and buyer approval. Never skip the pilot run; it is the last place to fix process problems cheaply. For the EU: CE (LVD + EMC under EN 60335 and EN 55014), RoHS, REACH, and food-contact compliance per Regulation 1935/2004. For the US: UL 1026 (or ETL) electrical safety, FDA 21 CFR food-contact compliance, and FCC for products with electronics/wireless modules. China exports require CCC for the domestic market. Confirm the exact certification package for your target countries with the factory before sampling. Ask for the process flow chart with inspection gates marked, test records from a recent production lot, machine inventory (molding machines, test equipment, line capacity), certificates for your product category, and reference customers in your market. Combine this with a third-party factory audit and a pre-shipment inspection on the first run. Documentation plus inspection is a strong substitute for a visit on the first order. Planning an OEM appliance program? Kangye supports OEM/ODM development across food dehydrators, electric grills, air fryer ovens, steamers, and pet care appliances, with certification-ready compliance packages and transparent manufacturing. Contact our team to discuss samples, MOQs, and customization.The OEM Appliance Manufacturing Process: From Mold Design to Container Loading
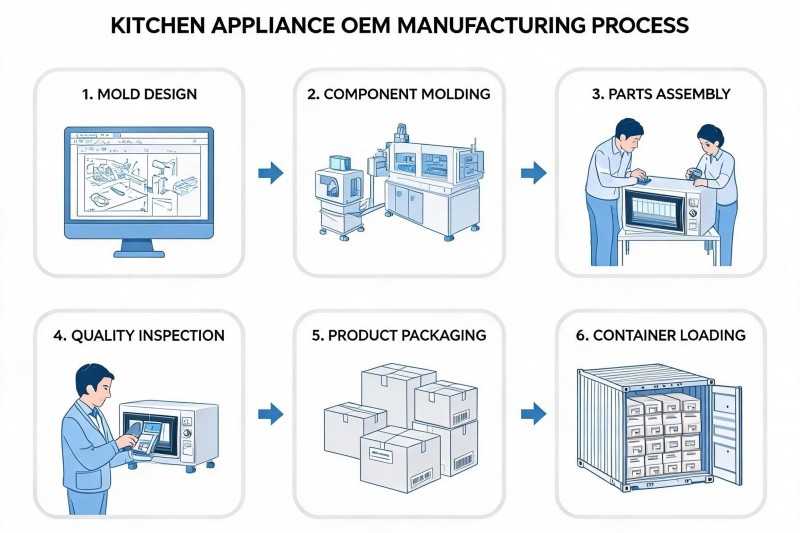
The Six-Stage OEM Manufacturing Journey at a Glance
Stage 1 — Product Brief and Design for Manufacturability (DFM)
Stage 2 — Tooling and Mold Development: The Long-Lead Item
Mold Type
Typical Cost (China)
Lead Time
Shot Lifetime
Best For
Prototype mold (aluminum/soft steel)
US$2,000 – 8,000
2–4 weeks
5,000 – 50,000 shots
Design validation, fit testing, early market feedback
Small-part production mold (8–16 cavities)
US$15,000 – 45,000
4–6 weeks
500,000+ shots
Knobs, buttons, fan blades, small frames
Medium-part production mold (2–4 cavities)
US$20,000 – 60,000
5–7 weeks
500,000+ shots
Housings, bases, lids
Large/overmold production mold
US$40,000 – 120,000+
7–10 weeks
300,000 – 1,000,000 shots
Two-shot cosmetic parts, complex mechanisms
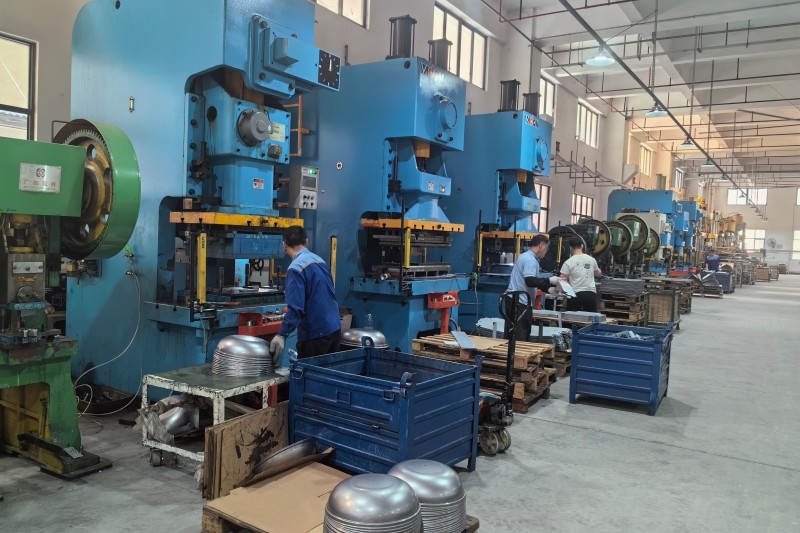
Stage 3 — Component Manufacturing: Injection Molding, Stamping, and Motors
Stage 4 — Heating Elements, Wiring, and Sub-Assembly
Stage 5 — Final Assembly and In-Line Safety Testing
Stage 6 — Packaging, Pre-Shipment Inspection, and Container Loading
Certification and Compliance: Built In, Not Bolted On
Timelines and Milestones: What a Realistic OEM Project Looks Like
Milestone
Typical Duration
Buyer's Role
DFM review & brief lock
1–3 days
Approve materials, voltage, certification target
Prototype molding & samples
2–4 weeks
Approve form, fit, function
Production tooling machining
4–8 weeks
Approve T0 sample, dimensional report
Sampling & certification testing
2–4 weeks
Book test lab, prepare technical file
Trial run (pilot production)
1–2 weeks
Audit pilot line, approve pilot units
Mass production
4–8 weeks
Schedule PSI, monitor production reports
Packing, inspection & loading
1–2 weeks
Arrange PSI and logistics
Red Flags to Audit Before You Commit to an OEM Program
How Kangye Runs the Process
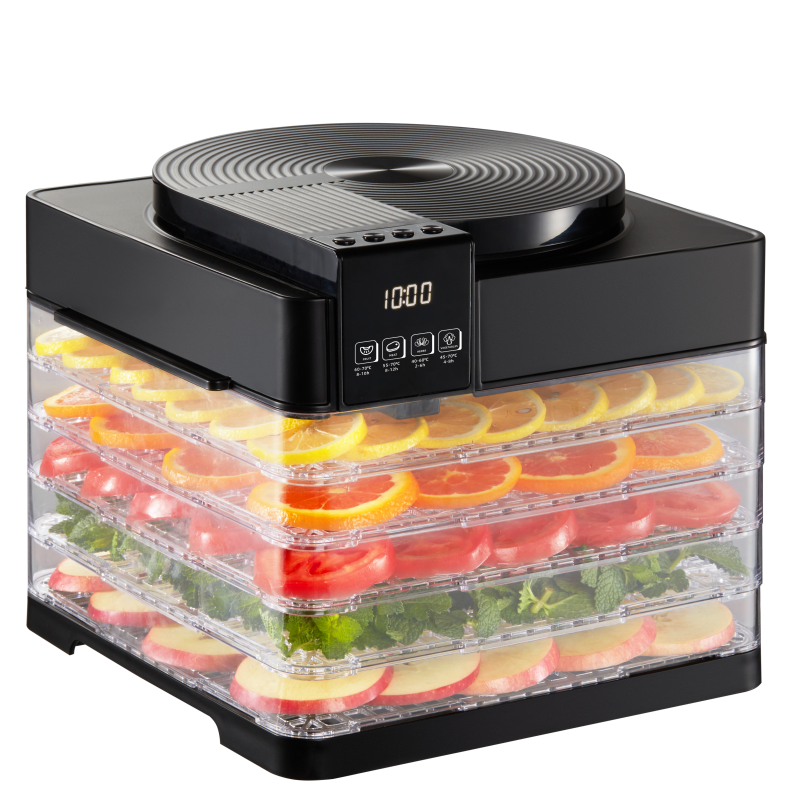
Featured Product: Kangye 5-Tray Food Dehydrator KYS-224
Key Takeaways for Global Buyers
Frequently Asked Questions
How long does a full OEM appliance program take?
What is the typical MOQ for an OEM appliance order?
Why is the mold so expensive, and who owns it after production?
What is the difference between a prototype sample and a pilot run?
Which certifications do kitchen appliances need for export?
How can I verify a factory's manufacturing capability without visiting?