Food Dehydrator Heating Systems Explained: Top, Bottom and Rear Heat
The dehydrator heating element and its position inside the cabinet decide more about a machine's drying quality than any other component. In a nutshell: bottom-heat machines are the affordable classic that demand tray rotation, top-heat machines protect the element but struggle with even airflow, and rear-heat (horizontal airflow) designs — the same layout used by Kangye's KYS-365 and KYS-362 — deliver the most uniform drying across every tray with less user intervention. For buyers sourcing food dehydrators for retail, private label, or a commercial program, understanding how the heating system is engineered is the difference between a product that dries jerky evenly in eight hours and one that forces customers to shuffle trays every hour.
This guide explains the three classic heating positions, the element technologies behind them (nichrome, ceramic and PTC), how thermostats translate into real temperature accuracy, and the food-safety temperature ranges your target market will expect — then maps it all to concrete specifications you can put in an RFQ.
Why the Heating System Is the Heart of a Dehydrator
Dehydration works by removing water from food with warm, moving air. A dehydrator is essentially three systems working together: a heating element that warms the air, a fan that moves that air across the food, and a thermostat or controller that keeps temperature in a safe, effective band. Move the same heating element from the bottom of the cabinet to the back, and you change the airflow pattern, the drying evenness, the cleaning burden, and the price — often more than changing the wattage would.
That is why experienced reviewers and extension services consistently tell buyers to look at heating placement before tray count or brand. Ohio State University Extension's guidance for choosing a dehydrator recommends a unit with "an enclosed thermostat from 85 to 160 degrees, a fan or blower to distribute air evenly," and an instruction manual — three features that are all functions of the heating system design, not the number of trays. When a machine cannot hold a steady temperature band or push air through every tray, no amount of wattage fixes it.
The Three Classic Heating Positions: Top, Bottom and Rear
Every food dehydrator on the market places its fan-and-heater assembly in one of three locations, and each layout has a distinct airflow signature:
| Design |
Airflow pattern |
Strengths |
Weaknesses |
| Bottom heating (stackable round trays) |
Vertical — air rises through the tray stack |
Lowest cost; compact footprint; classic, proven layout |
Uneven drying (bottom trays hotter); crumbs fall into the fan and element; trays usually need rotating; often no real thermostat |
| Top heating (stackable round trays) |
Vertical — air pushed down through the stack |
Element kept away from dripping moisture; moderate cost; usually includes adjustable temperature |
Warm air accumulates at the top, so upper trays run hotter; still needs tray rotation for even batches |
| Rear heating (horizontal cabinet) |
Horizontal — air flows across every tray simultaneously |
Most even drying; no tray rotation needed; quieter; easier to clean; individual tray access |
Larger footprint; higher cost; used mainly in mid-to-premium and semi-commercial machines |
The physics behind the table is simple: in a vertical stack, each additional tray adds airflow resistance and saps heat, so the tray farthest from the element gets cooler, slower-moving air. In a rear-heat cabinet, air travels horizontally across all trays at roughly the same velocity and temperature, which is why horizontal designs are widely described as the most uniform layout — the same reasoning we covered in our earlier technical comparison of bottom, back and top heating technologies.
Bottom Heating: Affordable and Proven, with Trade-Offs
Bottom-mounted fan-and-heater units are the classic entry-level design — think of the round, stackable dehydrators found at every big-box retailer. The advantages are real: the layout is simple and cheap to manufacture, the footprint stays close to tray diameter, and warm air naturally rises through the stack, so the machine works without elaborate ducting.
The trade-offs are equally real. Warm air tends to concentrate near the element, so the bottom trays dry faster and hotter than the top ones. Food crumbs and drips fall directly into the fan housing and onto the element, where residue can scorch and create odors that later migrate into the food — a contamination point that matters for any customer who dries herbs or jerky regularly. Budget bottom-heat models often ship without a usable thermostat (simple on/off operation), which collides directly with the food-safety temperature expectations we detail below. For a buyer, bottom-heat units are a legitimate price-point product, but they should be specified with a real thermostat and sold with honest expectations about tray rotation.
Top Heating: Safer Placement, Trickier Balance
Moving the element to the top solves one problem and creates another. The element no longer sits beneath the food, so drips and crumbs don't fall onto it — a genuine safety and hygiene improvement, since moisture contact is the main enemy of an open heating element. Top-heat machines typically also include adjustable temperature control rather than simple on/off switching.
The catch is thermal stratification: warm air naturally accumulates in the upper part of the cabinet, so the top trays run noticeably hotter than the lower ones. Some manufacturers argue this lets users dry temperature-sensitive items lower and tougher items higher, but in practice the gradient is hard to predict or repeat — and for uniform batches it means the same tray-rotation chore as bottom-heat models. Fewer top-heat models are made today for exactly this reason; it has largely been superseded by rear-heat engineering in better machines.
Rear Heating: The Horizontal Airflow Advantage
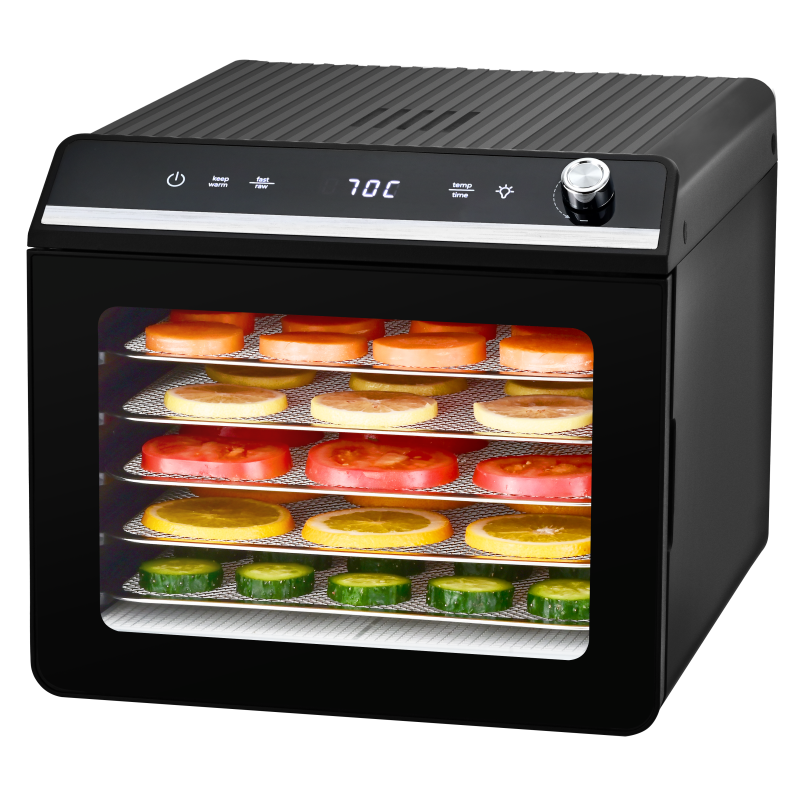
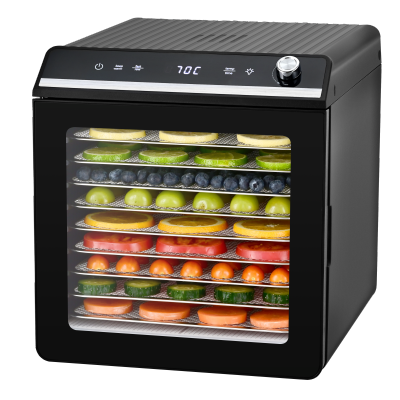
Rear-heat dehydrators — sometimes called horizontal or box dehydrators — mount the fan and heating element at the back of the cabinet and push air horizontally across every tray at the same time. This is the design most expert reviewers and commercial users prefer, and it is the layout behind Kangye's KYS-365 and KYS-362 series. The practical benefits are measurable:
- Even drying without rotation: each tray sees similar air velocity and temperature, so batches finish uniformly and users don't shuffle trays.
- Independent tray access: shelves slide out individually, so a batch can be checked, added to, or rearranged without disturbing the rest.
- Cleaner operation: the sealed rear assembly keeps crumbs and drips away from the element; interior surfaces wipe down easily.
- Quieter running: the fan is enclosed at the back, so less motor noise escapes into the room.
- Better for large or flat foods: square trays fit fruit leathers, herbs, and bigger cuts better than round stacking trays.
The honest costs are a larger countertop footprint and a higher bill of materials — which is why rear-heat units occupy the mid-to-premium price band and are the standard in semi-commercial and commercial dehydrators. For OEM buyers, the engineering question is whether your target price point can absorb a rear-heat cabinet; for every tier above entry level, the answer is increasingly yes.
Heating Element Technology: Nichrome, Ceramic and PTC
Beyond position, the element itself matters. Three technologies dominate the market, and they differ sharply in cost, lifespan, and safety:
| Element type |
How it works |
Typical lifespan |
Notes for buyers |
| Nichrome wire (open coil) |
Nickel-chromium resistance wire that glows when energized; fan moves air over it |
Lowest cost; consumer coils are often rated ~500–800 hours of use before burnout risk |
Fine for entry price points; confirm wire gauge, thermal fusing, and certification for unattended operation |
| Ceramic element |
Resistive element embedded in ceramic; ceramic acts as heat reservoir and electrical insulator |
~5–10 years typical; longer than open coils |
Mainstream upgrade; needs a thermostat to prevent overheating; good value balance |
| PTC ceramic |
Positive temperature coefficient ceramic — resistance rises sharply with temperature, so the element self-limits its own power |
6,000+ hours; industrial references cite 10,000+ hours for sealed ceramic IR panels |
Self-regulating = inherently safer (no thermal runaway), ~95–99% thermal efficiency, no separate cut-off needed; premium choice |
PTC elements are the fastest-growing choice in dehydrator manufacturing precisely because the self-regulating physics eliminates the classic failure mode of runaway overheating: as the element approaches its Curie point, resistance climbs and power drops automatically. For unattended overnight runs — the core use case for a 48-hour dehydrator timer — that inherent safety is a genuine selling point, not a marketing bullet. When you source, ask for the element type and its rated lifetime, and confirm the machine has redundant thermal protection regardless of element chemistry.
Thermostats and Temperature Control: From Bimetallic to Digital
A heating element without accurate control is just a hair dryer in a box. Temperature control in dehydrators spans three tiers:
- No thermostat (on/off): the machine runs the element at full power until you unplug it. Found on the cheapest stackable units. Unusable for meat or anything requiring a controlled 145–160°F band.
- Bimetallic mechanical thermostat: a metal strip bends with temperature and cycles the element. Simple, cheap, reliable — but accuracy drifts (field reports from industrial users cite ±3–4°C of drift on analog dials over time) and it holds a wider dead band than digital control.
- Digital/microprocessor control: a thermistor or NTC sensor feeds the controller, which cycles the element in a tight band. Digital machines hold ±1–2°C in normal operation, can display set and actual temperature, and enable preset programs — the practical difference between "dry at about 60°C" and "dry at 60°C."
For dehydrators, digital control is not a luxury: because drying runs run 4–48 hours, even a small temperature error is compounded over the whole cycle. Our technical guide to PID vs on/off temperature control digs into the control theory; for dehydrator buyers the takeaway is simple — specify the temperature tolerance you need, and verify it with the factory's calibration report, not just the datasheet.
Matching Dehydrator Temperatures to Food-Safety Guidelines
This is where engineering meets food safety, and it is the section your compliance team will care about. U.S. extension services publish consistent drying temperature guidance that any product sold into North America should be able to reach and hold:
| Food category |
Recommended temperature |
Source |
| Herbs |
95–115°F (35–46°C); up to 125°F (52°C) in humid climates |
National Center for Home Food Preservation (Univ. of Georgia, So Easy to Preserve, 6th ed. 2014); Cornell Cooperative Extension |
| Fruits & vegetables |
135–140°F (57–60°C) |
Cornell Cooperative Extension (Monroe); Illinois Extension (~140°F optimal) |
| Meats |
145–160°F (63–71°C) |
Cornell Cooperative Extension |
| Jerky |
160°F (71°C) minimum |
Cornell Cooperative Extension; NCHFP |
Two additional safety concepts matter for product design. First, the USDA-backed National Center for Home Food Preservation and UC researchers (Kendall & Sofos, 2012) stress that drying must reach safe internal temperature quickly — a water activity (aw) of 0.85 or below inhibits pathogenic bacteria such as Salmonella, E. coli, Listeria, and Staphylococcus, but food can spoil if it lingers too long in the danger zone before drying completes. That is an argument for a machine that can actually hold its set temperature, not drift upward toward "cooking." Second, dried fruit should reach roughly 20% moisture and dried vegetables about 10% — finish criteria that depend on consistent temperature over the whole cycle.
Here is the practical implication for sourcing: a machine whose range tops out at 60°C (140°F) cannot safely produce jerky for the U.S. market, where 160°F/71°C is the extension-service standard. Kangye's KYS-365 covers 95–167°F (35–75°C), which brackets the full extension guidance — herbs at the low end, fruits and vegetables in the middle, and meats/jerky at the top — plus a fan-only mode for air circulation without heat. When you put dehydrators on your shelf, temperature range is not a feature comparison; it is a market-access question.
What to Specify in an RFQ for Food Dehydrators
When you send an RFQ to a factory, translate everything above into testable specifications:
- Heating position and airflow: state your preference explicitly — e.g., "rear-mounted fan and element, horizontal airflow across all trays" — and request internal airflow diagrams or anemometer data showing tray-to-tray velocity variance (good machines: <10% variance across levels; budget machines have measured 30%+).
- Element type and lifetime: nichrome vs ceramic vs PTC, with rated lifetime and redundant thermal protection (thermal fuse + thermostat) for unattended use.
- Temperature range and accuracy: the full setpoint range in °C and °F, controller type (digital vs bimetallic), and a calibration report showing actual vs set temperature.
- Timer range: overnight capability — a 48-hour timer is standard on better machines; confirm auto-shutoff behavior.
- Materials: food-contact trays — stainless steel (304 preferred) vs BPA-free plastic; see our comparison of stainless steel grades in kitchen appliances for the 304 vs 430 decision.
- Certifications: IEC 60335-1 / 60335-2-9 (household heating appliances), EMC (EN 55014), food-contact compliance (LFGB/FDA), and target-market marks (UL/ETL, CE, SAA, etc.).
- Voltage variants: 120V/60Hz for North America, 220–240V/50Hz for EU/UK/Asia — the full matrix is in our guide to electrical ratings and voltage specifications.
For the broader sourcing journey — sample evaluation, factory audits, MOQs and quality control — our commercial food dehydrator buying guide and our step-by-step OEM sourcing guide cover the process end to end.
Featured Product: Kangye KYS-365 and KYS-362 Rear-Heat Dehydrators
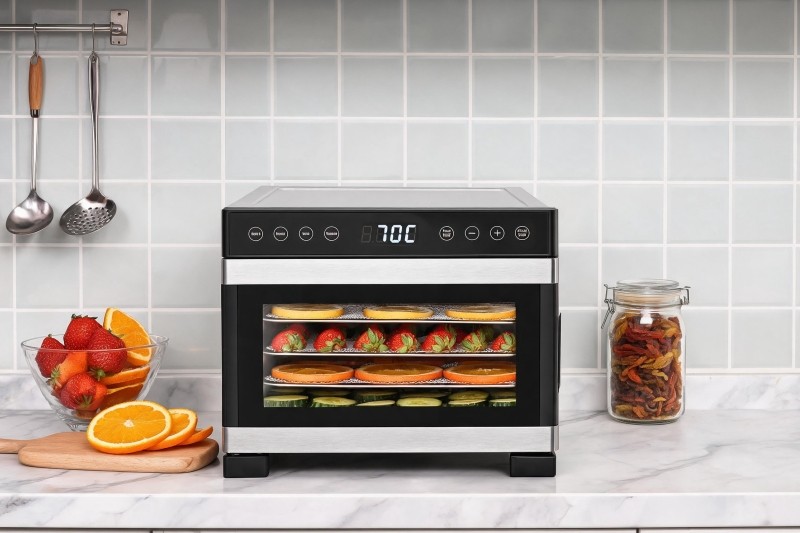
Kangye's KYS-365 Series is a 6-tray rear-heating dehydrator engineered around everything this guide covers: 550–650W with digital control, a 35–75°C (95–167°F) range that brackets the full U.S. extension-service temperature guidance, a 0.5–48-hour timer, a fan-only mode for air circulation without heat, and stainless steel trays with a transparent door so users can monitor batches without breaking the drying cycle. The compact KYS-362 Series offers the same rear-heat layout in a 5-tray format for value-oriented programs.
- KYS-365: 6 stainless steel trays · 550–650W · digital control · 35–75°C / 95–167°F · 48H timer · fan-only mode
- KYS-362: 5 trays · rear heating · 48H timer · compact footprint for entry price points
- 120V/60Hz and 220–240V/50Hz variants for your target market
- OEM/ODM: branding, voltage, plug, packaging and accessory options
Explore Kangye's full product lineup
Frequently Asked Questions
Is a rear-heat dehydrator really better than a bottom-heat model?
For even drying, yes. Rear-heat (horizontal airflow) designs push air across all trays at similar velocity and temperature, so batches finish uniformly without tray rotation. Bottom-heat stackable units are cheaper and compact but dry unevenly and collect crumbs in the fan housing. The premium is a footprint and price trade-off, not a marketing one.
What is the ideal dehydrator temperature range for a product spec?
To cover U.S. extension-service guidance, a machine should reach from about 95°F (35°C) for herbs to at least 160°F (71°C) for jerky, with fruits and vegetables around 135–140°F (57–60°C). A 35–75°C / 95–167°F range brackets all of it. Ranges topping out at 140°F cannot safely support meat or jerky programs.
PTC vs nichrome heating elements — which should I specify?
PTC ceramic elements self-regulate their power draw, eliminate thermal-runaway risk, and offer ~95–99% thermal efficiency with 6,000+ hour lifespans — ideal for unattended overnight dehydrating. Nichrome open coils are cheaper but have shorter rated lives (~500–800 hours in consumer use) and need robust thermal protection. Specify the element type and lifetime in your RFQ.
Does wattage matter more than heating position?
No. Wattage determines how fast a machine recovers heat, but evenness comes from airflow design and temperature control. A 600W rear-heat unit with digital control will dry more uniformly than a 700W bottom-heat unit with a bimetallic dial. Match wattage to chamber volume, and judge the heating system by airflow pattern and thermostat accuracy.
Can a 60°C dehydrator safely make jerky?
Not for U.S. retail. Extension services recommend a minimum of 160°F (71°C) for jerky to kill pathogens during drying. A machine that can't reach or hold 71°C cannot be honestly marketed for jerky in that market. Verify the top end of the range and the temperature tolerance with the factory's calibration report.
Why do rear-heat dehydrators cost more?
Higher bill of materials: a larger cabinet, sealed rear fan assembly, ducting for horizontal airflow, and typically digital controls. Round stackable units use a simpler, cheaper layout. The extra cost buys even drying, independent tray access, quieter operation, and easier cleaning — the features that drive repeat purchases and fewer returns.
Key Takeaways for Buyers
- Heating position defines the product: bottom-heat = entry price + tray rotation; top-heat = safer element placement but stratification; rear-heat = the uniform, premium choice.
- Element technology is a safety spec: PTC ceramic self-regulates and lasts; nichrome is cheaper but needs robust protection — and specify it in writing.
- Temperature range is market access: 160°F/71°C minimum for jerky, 135–140°F for produce, 95–115°F for herbs — verify your machine brackets the guidance for your target market.
- Digital control compounds over hours: even small temperature drift gets amplified over 4–48-hour cycles; demand calibration reports, not datasheet promises.
- Put everything in the RFQ: airflow variance, element lifetime, temperature tolerance, materials, certifications, and voltage variants are all testable specifications.
Planning to add food dehydrators — rear-heat, stackable, or semi-commercial — to your product portfolio? Kangye is an OEM/ODM manufacturer based in Guangdong, China, with 35+ years of manufacturing experience, exports to 100+ countries, and a product line covering food dehydrators, air fryers, grills, pizza ovens, steam cookers, vacuum sealers, and pet appliances. Contact our team to discuss samples, MOQs, certifications, temperature-control options, and private-label programs.